
Upload Local Files
You can upload local files to a dataset so EZChat can parse the content and create searchable chunks. Before uploading, make sure the content is accurate, the file structure is clear, and sensitive data that should not enter AI retrieval is removed.
Upload While Creating a Dataset
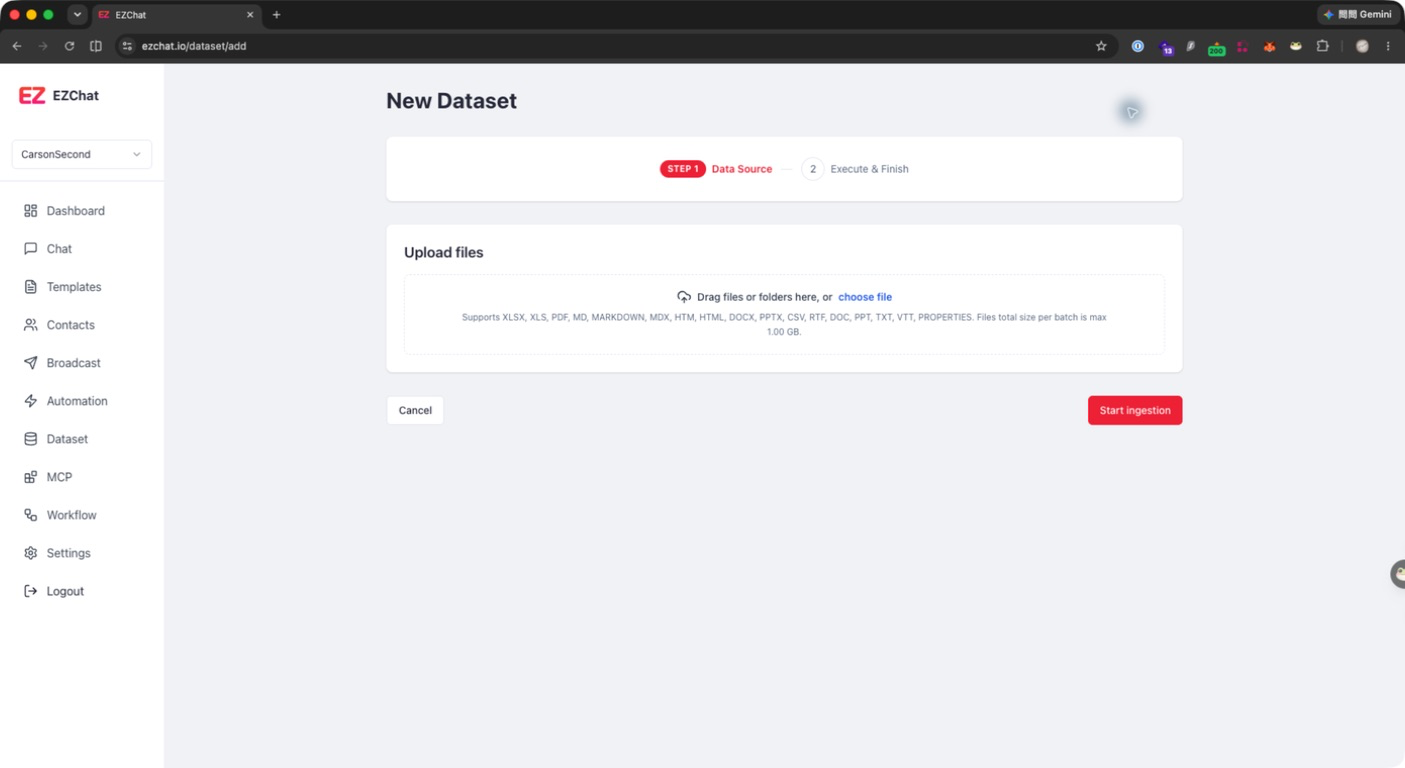
- Open Dataset > New Dataset.
- Drag files into the upload area, or click Select files.
- EZChat checks file extensions and the total size of the batch.
- Files are uploaded to storage first, then registered as documents.
- After all file statuses are complete, click Start ingestion.
Add Files to an Existing Dataset
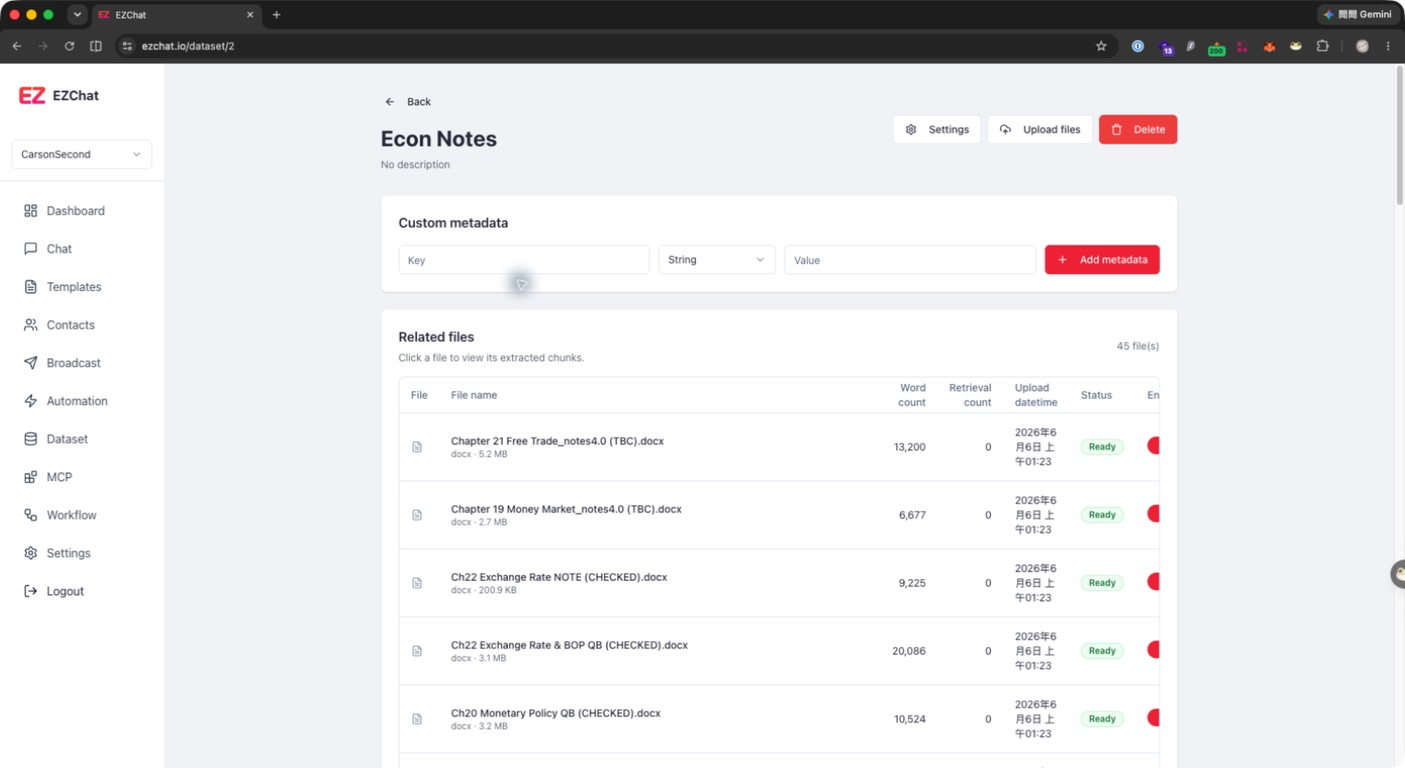
- Open the target dataset.
- Click Upload files in the upper-right corner.
- Select one or more local files.
- EZChat uploads each file, registers it as a document, and links it to the current dataset.
- Check each document status in the file list.
File Limits
Supported formats and size limits are returned by /documents/upload-config. The page displays accepted formats and the maximum batch size dynamically. Common cases include:
- Unsupported file extensions are rejected.
- A single file or the full batch is rejected if it exceeds the size limit.
- When adding duplicate files with the same name, size, and modified time, the page avoids adding the same file to the upload list more than once.
Status After Upload
After files are added to a dataset, they appear in the related files list. Possible statuses include:
| Status | Meaning |
|---|---|
| Pending | The document has been queued for processing. |
| Processing | EZChat is parsing content and creating vectors. |
| Completed | The document is ready for retrieval. |
| Failed | Processing failed. Check the file or upload it again. |